
-
 21444 Hits
-
 85.77% Score
-
 21 Votes
|
|
Route |
|---|---|
|
|
39.11754°N / 107.05507°W |
|
|
Hiking, Mountaineering, Scrambling, Skiing |
|
|
Spring, Summer, Fall, Winter |
|
|
One to two days |
|
|
Class 3 |
|
|
Moderate Snow |
|
|
The Stats
Snowmass Mountain - Elevation 14,092 feet
Route - East Slopes Standard Route
Trailhead - Snowmass Creek Trailhead, Elevation 8,400 feet
Elevation gain from TH to Summit - 5,700 feet
Round Trip Milage - 23 miles
Mileage to Snowmass Lake - 8
Getting There/Approaches
No matter what approach you take for this route, you need to get to Snowmass Lake. There are two ways to get here that are both direct and scenic and I will describe them both here.
Snowmass Creek Trailhead
This is the standard trailhead to use and is at an elevation of 8,400 feet which is low for a Colorado trailhead. From Glenwood Springs on I-70, take CO Highway 82 south for 28 miles to the small town of Snowmass (not to be confused with Snowmass Village which is a different town). In the town of Snowmass turn west onto the paved Snowmass Creek Road at a stoplight and begin measuring from this point. After 1.7 miles turn left at the T junction and cross Snowmass Creek after 10.7 miles. Reach a second T junction after 10.9 miles and turn right. The trailhead is at the end of the road at mile 11.3 and is signed with a decent sized parking area. The last part of this road is dirt and sometimes has large potholes but should not be a problem for just about any vehicle.
Snowmass Creek Approach
This approach to Snowmass Lake is 8 miles long each way and rises about 2,600 feet. The Snowmass Creek trail is pretty flat until 4 miles in and at 1.76 miles in you will reach the last of three gates. At around 3 miles in you will see the first of several large (room size) boulders on your right. At around the 4 mile mark there is a great view of North Snowmass Mountain and the north face of the ridge that borders the Pierre Lake basin’s south flank. This is a good rest spot. At around 5 miles you will come to a flat, open area where the creek is wide and braided with many small ponds. The trail continues on the left side of the creek. At around 5.5 miles is an obvious creek crossing using a logjam. This logjam has been known to cause problems crossing it in early season. Excercise caution when crossing. Once across the logjam, the trail begins climbing much steeper and stays that way for the next 2.5 miles to the lake. It's about 1,000 feet from the logjam to the lake on some steep switchbacks. At the lake there are numerous great camping sites and awesome views!
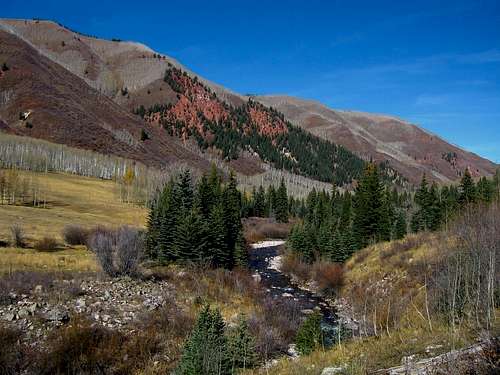 Walking the Snowmass Creek trail in the first mile | 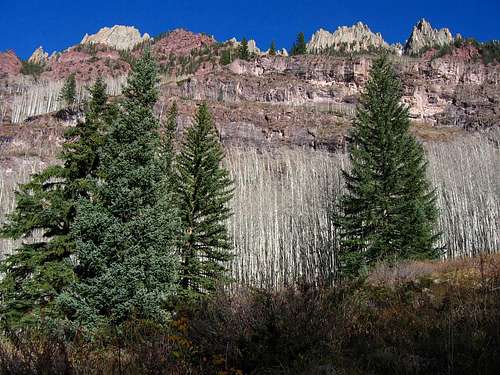 Views up at the craggy peaks above the Snowmass Creek trail |
 About four miles into the hike the first views of Snowmass appear looking up the Bear Creek drainage which leads to Pierre Lakes. | 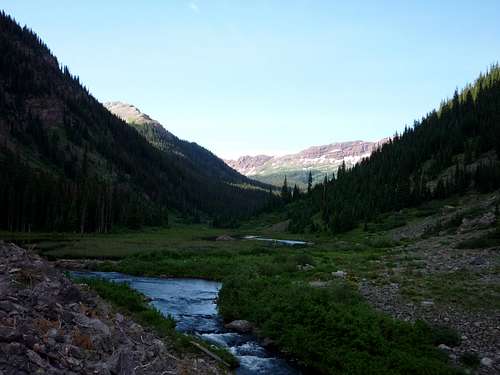 Open area after 5 miles | 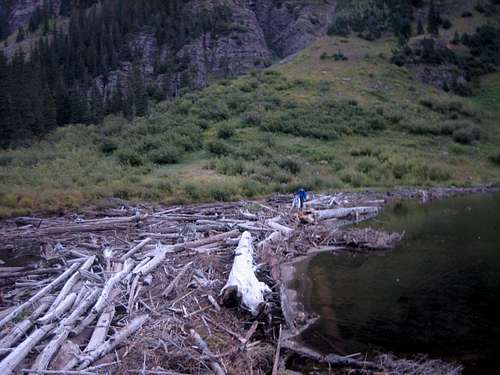 Logjam crossing looking east after 5.5 miles |
 Ponds near the log jam along the Snowmass Creek trail | 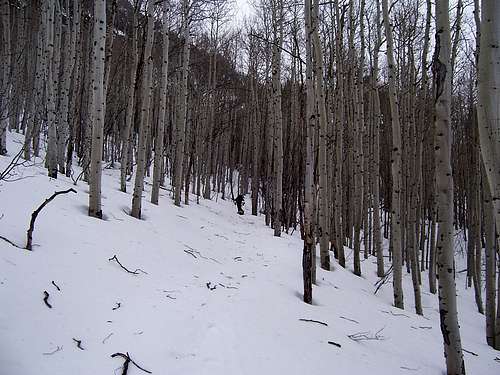 Hiking through one of the many aspen groves in early spring |
This trailhead is one of the most popular spots in Colorado because the classic Maroon Bells photo everybody takes from Maroon Lake is within spitting distance of the parking lot. This trailhead is used for the approach over Buckskin Pass and starts at 9,600 feet but don't let that higher elevation fool you. This approach actually has considerably more elevation gain. From the north end of Aspen at the big round-about, take the Maroon Lake Road turn-out and head southwest for 9.4 miles to the large parking area just east of Maroon Lake. I have never had problems sleeping next to the car at this trailhead so long as you arrive at or after dark.
Buckskin Pass Approach
This approach starts at the Maroon Creek trailhead and is also 8 miles each way. It's harder since you have to go over Buckskin Pass each way but certainly more scenic. From the parking lot follow the tourist path around the north side of the lake and begin ascending towards Crater Lake. Right as you reach Crater Lake at 10,100 feet, about 1.5 miles from the parking lot, you will reach a signed trail junction. Take the right trail towards Buckskin Pass and follow it up to treeline at 11,500 feet and beyond as it switchbacks up to the 12,500 foot pass. You will pass another junction for a trail heading right (north) to Willow Lake. Stay left here and continue west. The views atop Buckskin Pass are superb. Descend down the other side until you reach Snowmass Creek at 10,700 feet. Cross the creek and continue on the trail back up to Snowmass Lake. This trail meets with the Snowmass Creek Trail about 0.5 miles from the lake at a signed junction.
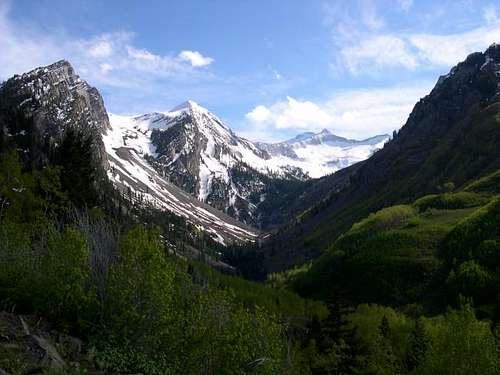
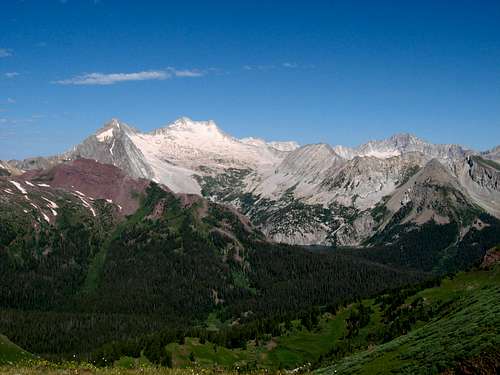 Snowmass Mountain from Buckskin Pass | 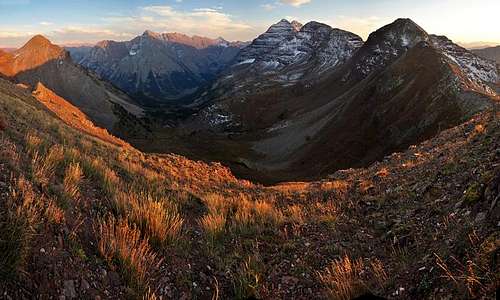 Sunset from Buckskin Pass |
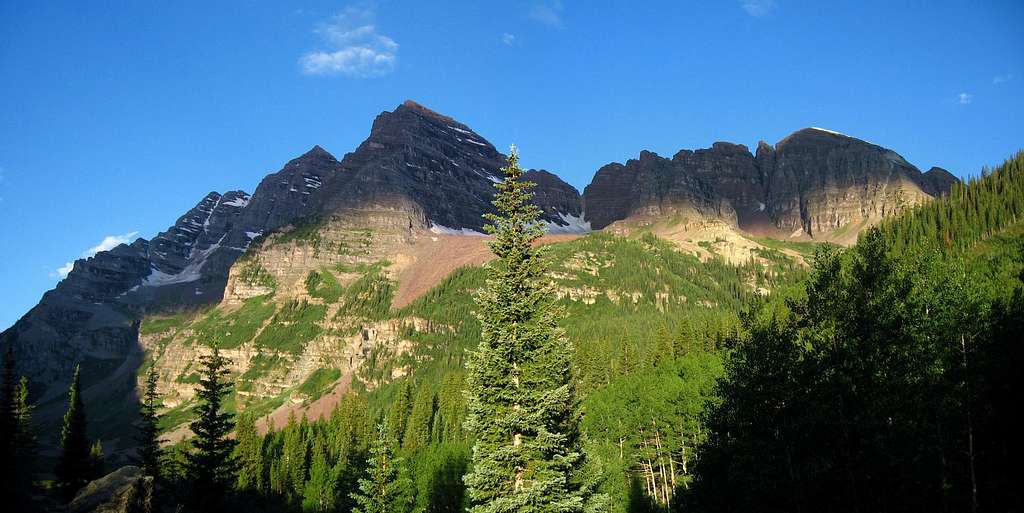
Maroon Bells near Crater Lake
Route Description
This route is best done in two days. From the east shore of the lake, follow the well worn trail on the south shore (left side) of the lake. If it has rained or is raining, you will get soaked from the moisture on the vegetation, so wear raingear. If you start to get far above the lake you are on the wrong trail that takes you to Trail Rider Pass. Once at the West side of the lake, walk through some brush and continue on one of the many cairned routes leading up the large talus slope to the west of the lake. Try and stay to the left (south) side of the big gully and use extreme caution ascending this talus slope as the rock is loose.
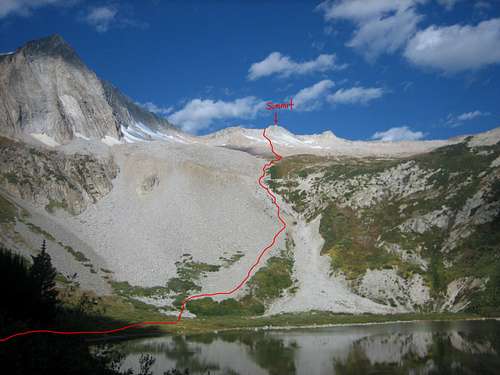 Route up the big talus slope from the Lake | 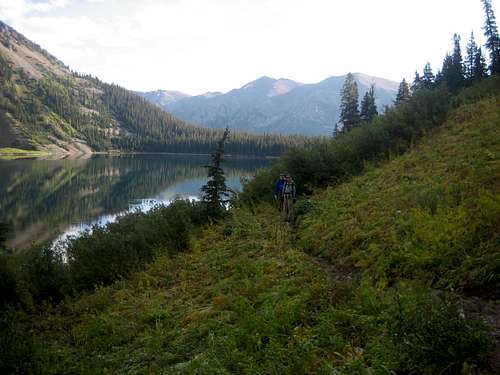 The trail around Snowmass Lake |
Once you have gained the top of the big talus slope, the angle eases up a little and you are greeted with a fantastic view of the east slopes. Most of the time this area is snow covered but in August and September on a dry year it may all be talus. Try to hit it when it is covered with nice firm snow. Aim for the summit as a bearing and continue up the east slopes. There are many cairns along the way but just head towards the summit. The shortest way to gain the ridge, although steeper, is the gully/slot pictured in the center photo below located about a tenth of a mile to the southeast of the summit. This gully is steep (~45 degrees) and requires care. Crampons and an ice axe are surely needed if snowy. If rocky, a helmet would be a good idea. The final push up the gully to the ridge is the steepest and is Class 3. In spring there can often be a cornice at the top of this gully to negotiate. You'll crest the ridge right around 14,000 feet and have about a 100 foot ascent to the northwest on the Class 3 ridge to the summit. Stay on the left side of the ridge to avoid the towers on the crest. There have been injuries, accidents and even fatalities on this route so use caution and step lightly.
The traditional but longer way to reach the ridge is by veering further left (south) when ascending the east slopes and aiming for a more mellow route to the ridge about a quarter mile to the southeast of the summit. Doing this you will crest the ridge at about 13,750 feet and have a longer ascent on the ridge, which can be either good or bad. The ridge is sustained Class 3...pick your poison. Round trip distance from the east side of Snowmass Lake to the summit is about 6.5 miles, 3,100 feet elevation gain, and will take roughly 8-10 hours. Follow your ascent route back down. You can utilize the snowfields and glissade if there is good snow around. This is also a popular ski descent.
 Looking down on Snowmass Lake from the top of the talus slope | 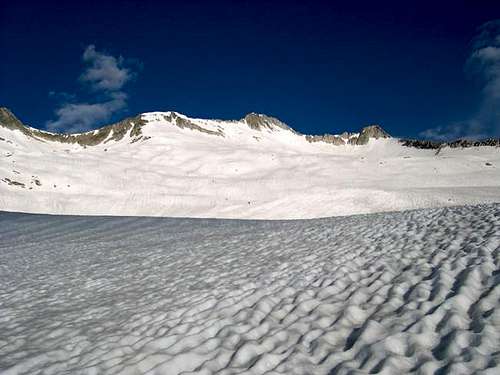 This is what the route would look like under snow |
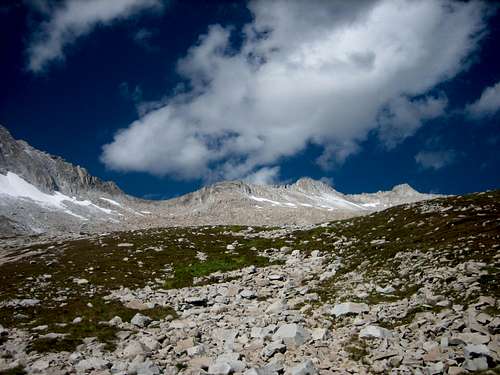 Looking at Snowmass Mountain Summit from 12,000 feet | 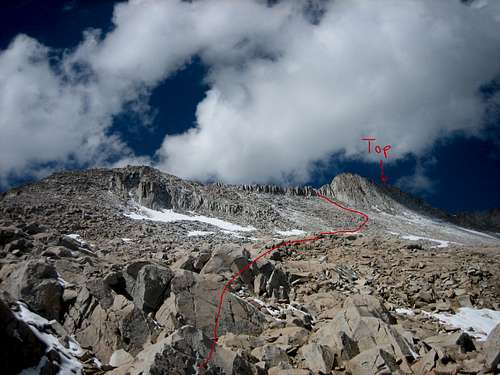 Route as seen half way up the boulder field | 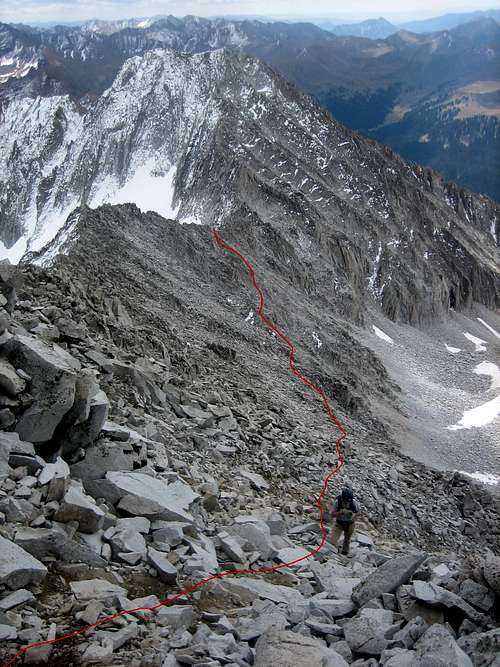 Final ascent up the ridge |
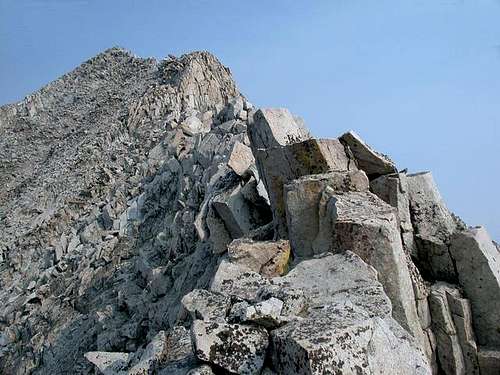
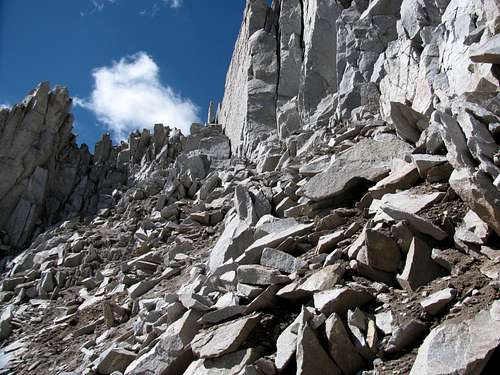 View of the gully to reach the ridge via the shorter, steeper route |  The class 3 finish on the ridge to the summit |
Map of the Route
Summit Views/Photo Gallery
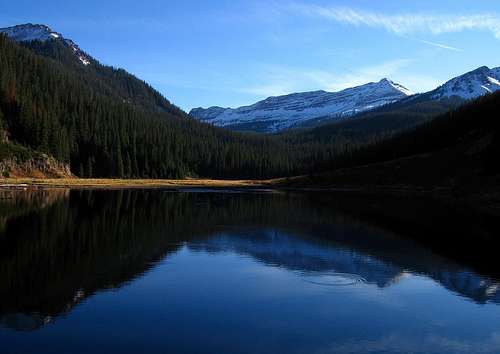
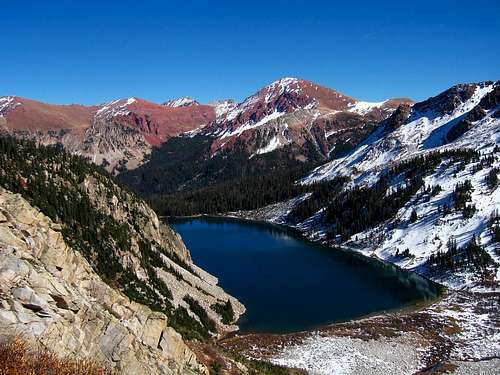
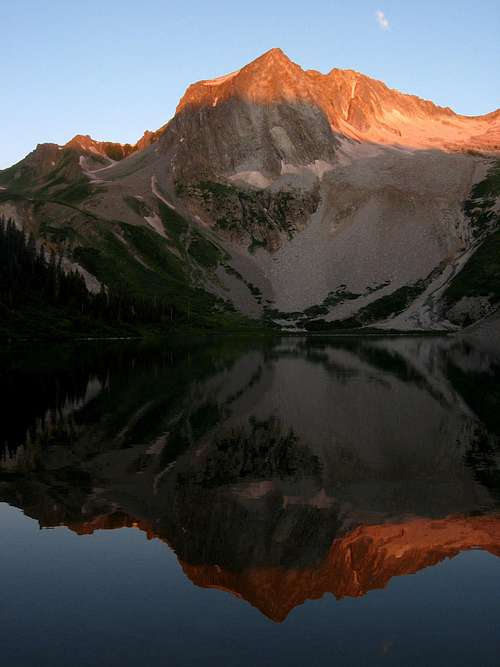
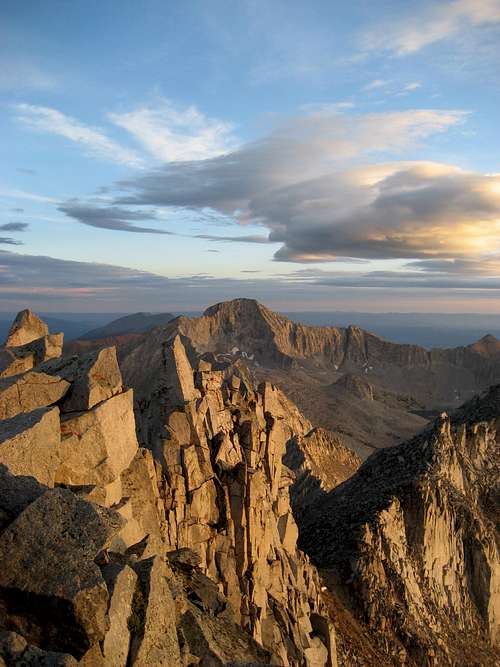 Sunrise from Snowmass Mtn | 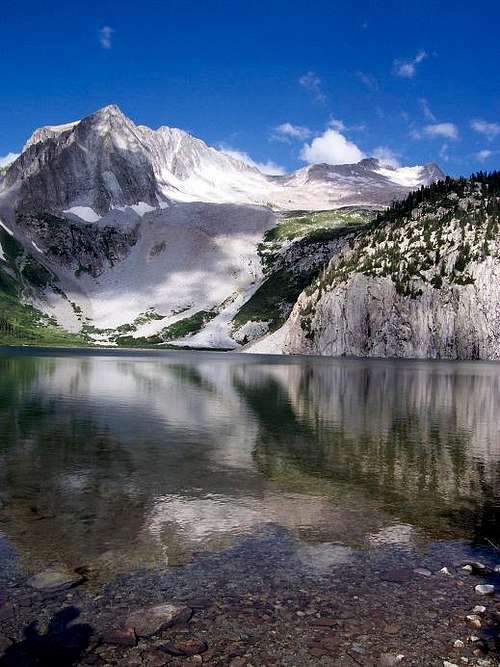 Snowmass Lake | 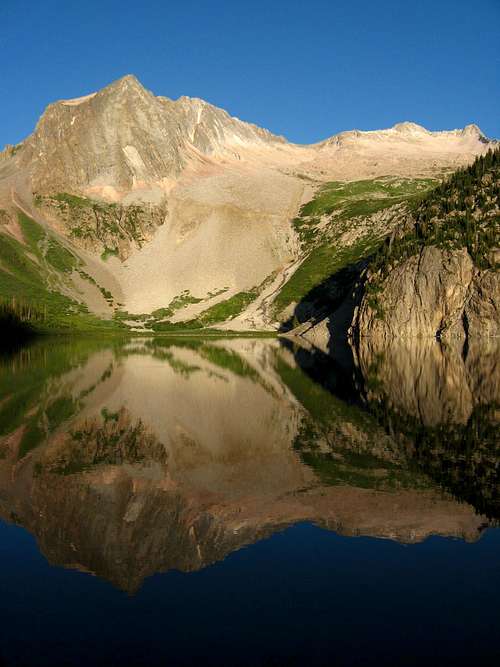 Reflection in Snowmass Lake |
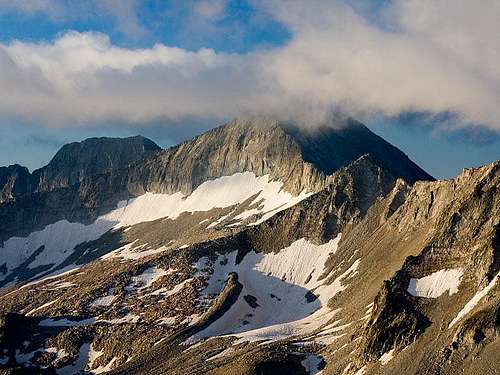 Snowmass Mountain under some clouds |  Capitol Peak from Snowmass Mountain | 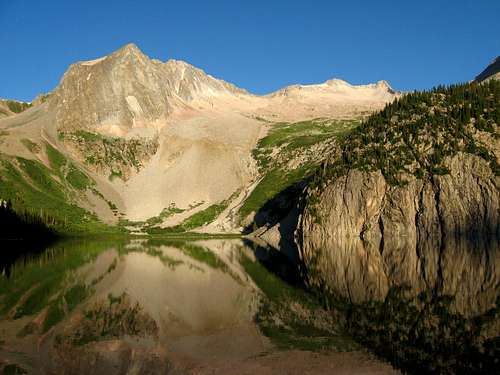 Snowmass Mountain in full morning light |
 On the summit ridge | 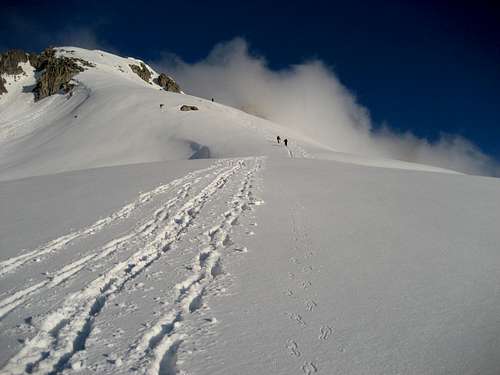 Climbers en route to the summit ridge |  Snowmass Mountain from Hagerman Peak |
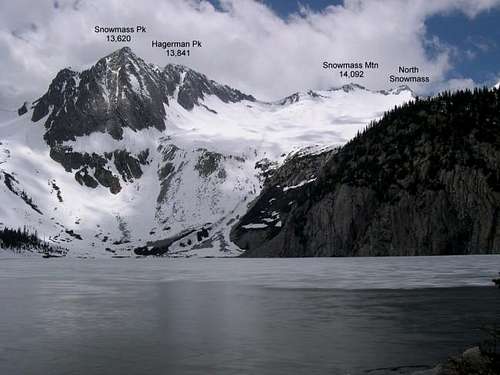 Labeled photo from Snowmass Lake | 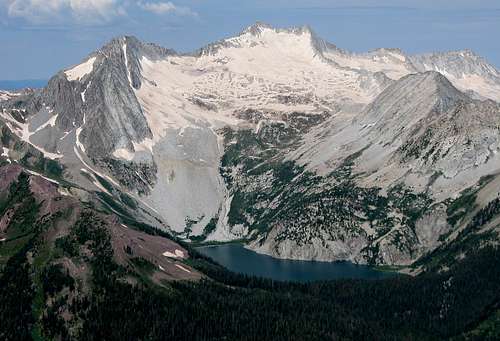 Snowmass Mountain from Buckskin Pass | 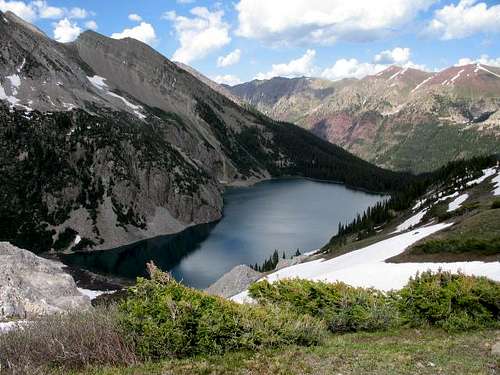 View down to Snowmass Lake |
 Sunrise reflection in Snowmass Lake | 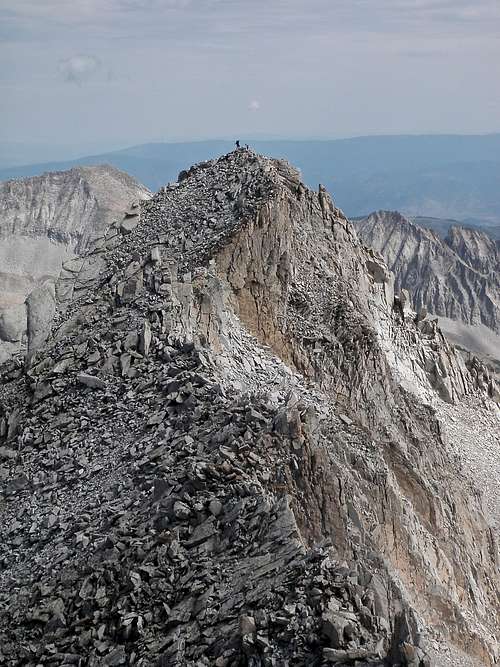 Hikers on the North Snowmass Summit | 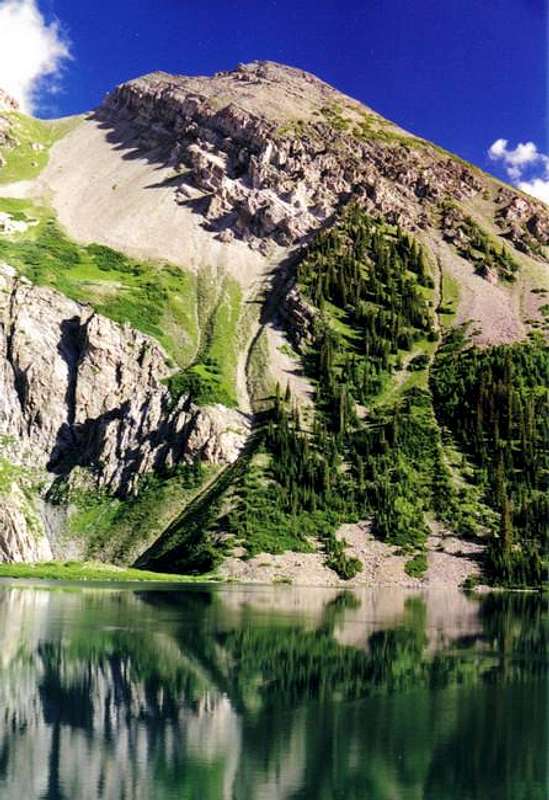 View from camp at Snowmass Lake |
Essential Gear
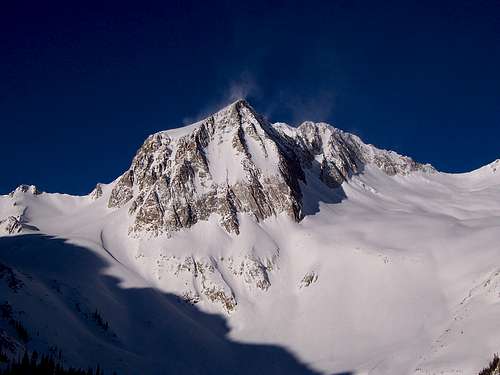
Snowmass Peak (13,620 feet) the day after a storm
Helmet
Ice axe
Crampons
Sturdy boots
Lots of water
Headlamp
Headlamp
Warm clothes
Rain gear and gaiters
Sun protection (this area is VERY bright!)
Camera
Also bring if spending the night:
Tent
Sleeping bag and pad
Water filter
Stove (fires are not allowed at the lake)
Gloves
Red Tape and Camping
Once at the lake, there are around 7 “legal” camp spots and enough room for 25 “illegal” camp spots. No campfires or horses are allowed within 0.5 miles of the lake. In addition, you must camp 100 feet away from the trail or lake shore.
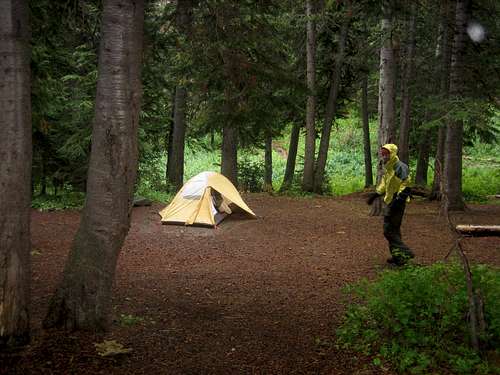
Camping at Snowmass Lake
Seasonal Considerations
Late Spring - May through June: Lots of Snow...you can ski it. Big spring storms have been known to dump quite a bit of snow so be prepared for cold, windy and snowy conditions.Summer - July through Early September: Some snow still around but generally warmer. Be aware of the afternoon thunderstorms and plan to be on your way down by noon.
Fall - Late September through November: Fall snows begin to come down making for a post-hole fest of loose powder with slick rocks just below. Not the most enjoyable time to climb it but the cool, crisp fall air make for stunning scenery.
Winter - December through April: Avalanche dangers are often very high in this area. Know how to navigate in avalanche terrain. Snowshoes and/or skis a must...mileages and time required is increased dramatically.
External Links
Route Description on 14ers.com