Overview
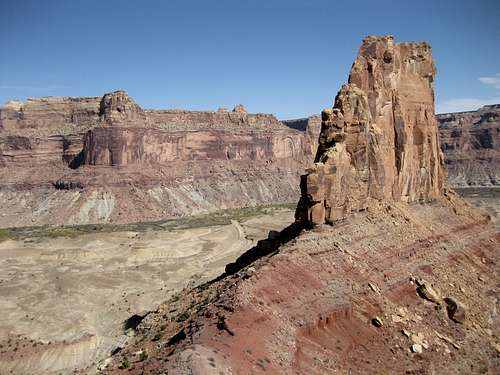
Those who find themselves at the San Rafael Bridge Recreation Site in Utah's San Rafael Swell-- a wilderness of sandstone domes, cliffs, monoliths, spires, and slot canyons-- discover that they are in one of the most stunning locations not only in Utah but also in all of America. The cottonwood-lined San Rafael River cuts through the area east-west, and seeing it in October, when the cottonwoods have changed to gold, can be unforgettable. The sheer red cliffs present in much of the area are here, too, but more notable are three desert mountains that rise from the plains like fortresses. To the east are Assembly Hall Peak and massive
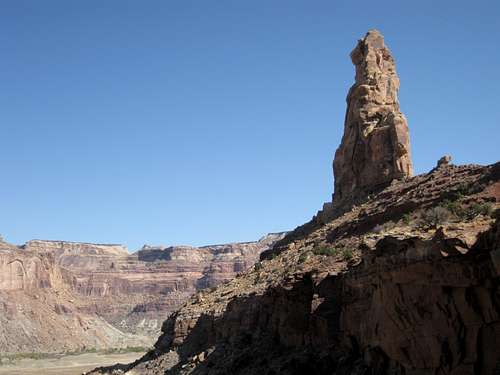
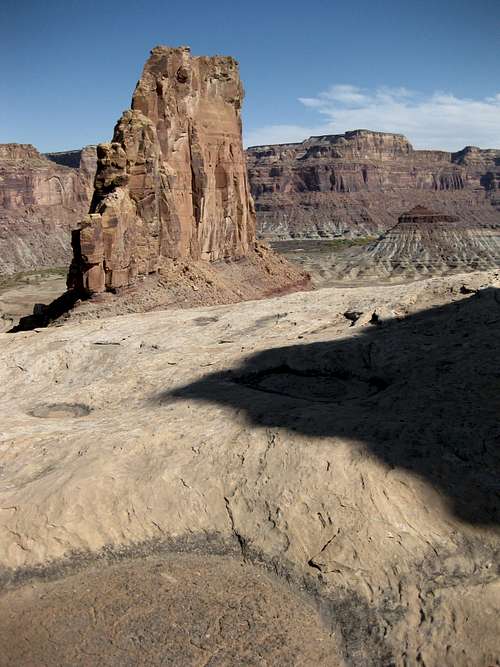
Window Blind Peak. And to the west is the distinctive spire Bottleneck Peak, a 400' tower that from many angles does indeed resemble a bottleneck or something similar.
Curiously, every topo map I have examined does not label the spire as Bottleneck Peak even though it has over 400' of prominence from the saddle connecting it with the higher peak to its south. It is that higher peak that maps label as Bottleneck Peak
From Scott: Actually, this was just a blunder on account of the USGS. The tower is actually the real Bottleneck Peak. Some call this Bottleneck Mesa to avoid confusion, but the tower has always been known as Bottleneck Peak-for obvious reasons. Unfortunately the USGS seems to never get around to updating their maps.
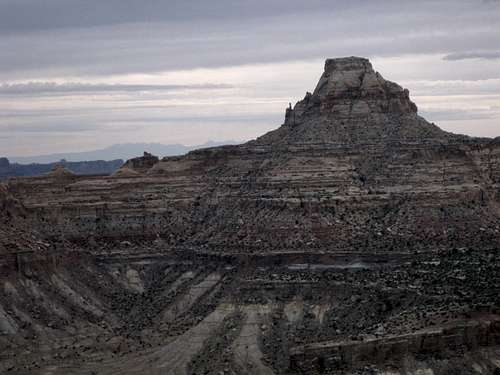
Bottleneck Peak is unattainable unless you are a 5.10 climber, but you can climb Bottleneck
Mesa with some Class 3 and 4 skills.
Getting There
First, and especially if you are using any approach other than from Exit 131 on I-70, I recommend having and using the DeLorme Utah Atlas & Gazetteer or (better) the National Geographic Trails Illustrated map for the San Rafael Swell (Map 712). The latter gives better detail and also lists mileage between junctions on both roads and trails, and it provides information on regulations, weather, etc.
There are three main ways to approach the area: from the north and northwest via Huntington and Castle Dale, from I-70 to the south, and from the east via U.S. 6. I have never used the first approach but have used the other two twice each and will describe them.
From I-70: This is the easiest way. It is on a good dirt road that has only a few rough spots and can be handled easily by most passenger cars. About 30 miles west of Green River, use Exit 131 and head north/east. Follow this road for almost 18 miles to a spur road on the left; if you cross the San Rafael River, which is half a mile north, you have gone too far. Follow the spur for about 0.7 mi to a trailhead and corral. As you reach the end, bear left and park in a little circle.
From U.S. 6-- About 15 miles north of I-70, you drive through an underpass beneath a railroad. Between two and three miles north of that underpass, there is a major dirt road on the west side of the highway. This is the Green River Cutoff Road, and you want to get on it. There is another dirt road before it; it is rougher but does lead to Green River Cutoff Road. Once on GRCR, follow the main road for about 28 miles to a signed junction, where you go left (south) to Buckhorn Wash and the San Rafael River. Now drive 10 miles to the spur mentioned in the previous description and follow directions from there; at about 5 miles along, stop at the incredible Buckhorn Wash Pictograph Panel (see this page's gallery for images). The roads for this approach are mostly good dirt roads, but there are some narrow, rocky sections near the beginning as you drive through a badlands area, and you might like to have high clearance.
If the roads are wet or a storm is likely, stay off them entirely, for they will likely turn into a gumbo impassable even for 4WD vehicles.
A Route
Notice that I say
a route, not
the route. I believe after studying maps in advance and the terrain with my own eyes that my route up is the best non-technical one, but I do not claim that it is the only one, and it may not even be the best one.
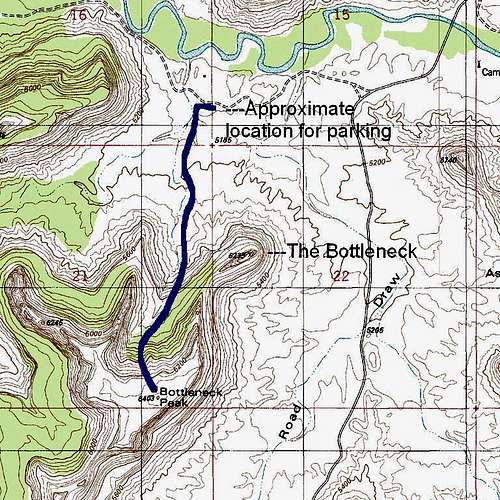
![Bottleneck Mesa-- Route]() Route photo
Route photo 1.5 miles
Difficulty: Mostly Class 2 but some sections where Class 3 is certain and Class 4 is possible.
Elevation Gain: About 1300', but there is only about 150' of gain for the first 0.75 mi; the rest is very steep.
What I Did: From where I parked, I dropped into a large wash that is the "trail" here and began hiking southwest. Less than 0.1 mi along, I headed left into
another wash and followed it until it steepened below a dryfall that I wasn't going to be able to climb directly. I found a scrambling route to the left and also saw what looked like a loose clambering route on the right. The wash itself was mostly easy walking, but there was some occasional scrambling to get around and above pouroffs.
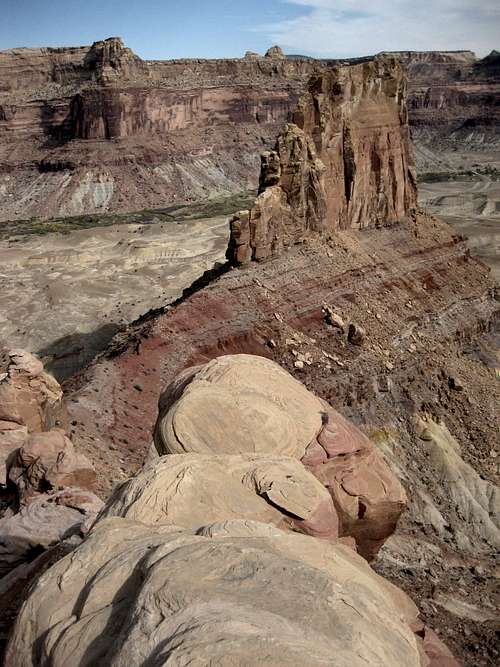
Above the dryfall, the wash resumed its flat course, but I turned off very quickly to follow a steep gully that climbed to the summit plateau; near the top, there was some Class 3 scrambling.
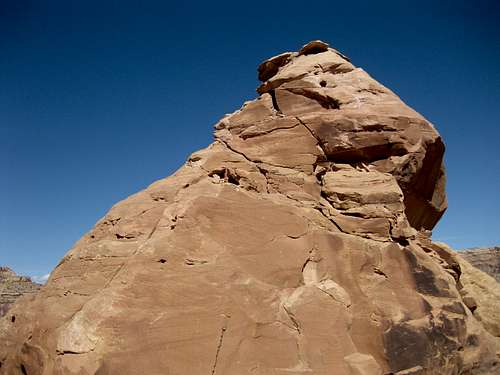
Once upon the summit plateau, I could see the summit outcrop a short distance ahead of me, and it was an easy clamber to get to and up it. There are two notable outcrops on the summit plateau, and while the northern one is a more enjoyable scramble, the southern one is the highpoint.
Side Trips
Many are possible. Here are two:
1-- From the summit, I hiked north and first climbed the other prominent outcrop and then continued on, hoping to find a way to the saddle between Bottleneck Mesa and Bottleneck Peak. Unfortunately, I ultimately cliffed out at drops that were not terribly high (maybe 25', which is enough to kill), but not before enjoying excellent views (better than those from the summit outcrop, I thought) and some fun route-finding and
Class 4 climbing. No regrets at all for the "wasted" time.
2-- On my descent, I traversed north along sandstone ledges and ramps to the vicinity of the saddle, hoping I could access it that way. Once again, I ultimately cliffed out, but I again found some outstanding views and some nice scrambling on interesting outcrops.
3-- The saddle. I never did get there, but it would have been easy to reach it from lower on my route. However, that saddle will have to be your destination unless you are out for a technical climb.
Climbing Bottleneck Peak
Anyone seeing this awesome spire is going to wonder if it can be climbed. It can. On rockclimbing.com, I found mention of a
5.10a trad route, but it did not have much information.
Red Tape and Precautions
No fees or permits are required.
As mentioned already, stay away if it is wet or looks likely to become so.
As much as possible, avoid stepping on the biological crust out here; it is alive and is critical to the desert ecology, and it is fragile. If the soil looks lumpy, dark, or crusty, avoid it. Better yet, try to stay on exposed rock and in sandy washes as much as you can.
You are, at the least, almost 20 miles from a paved road and farther than that from the nearest town. Prepare accordingly for the event of a flat tire or mechanical breakdown; I recommend having a full-size spare and enough food and water for two nights.
Camping
There is a campground at the San Rafael Bridge Recreation Site. I have never stayed there, but I know there is a fee (probably around $10) and that there are pit toilets. I do not know if there is water, so bring your own.
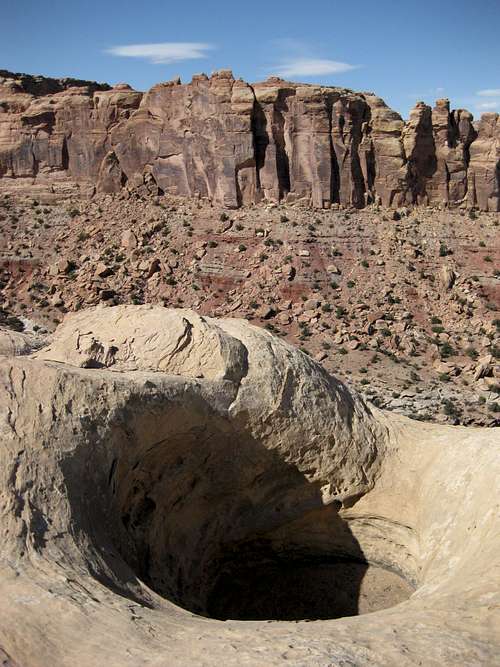
Views from Up High

 9153 Hits
 85.87% Score
 21 Votes

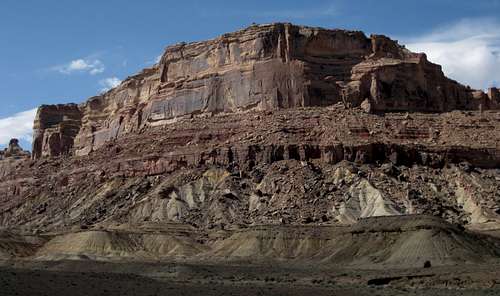
 Route photo