

-
 91382 Hits
-
 95.67% Score
-
 54 Votes
|
|
Mountain/Rock |
|---|---|
|
|
9.34626°S / 77.39766°W |
|
|
Mountaineering |
|
|
Spring, Winter |
|
|
19790 ft / 6032 m |
|
|
Overview
Tocllaraju 6032 m
What's New on this Page?
* May 27, 2021 - Adopted the page from rgg
* May 30, 2021 - Overhaul of the page
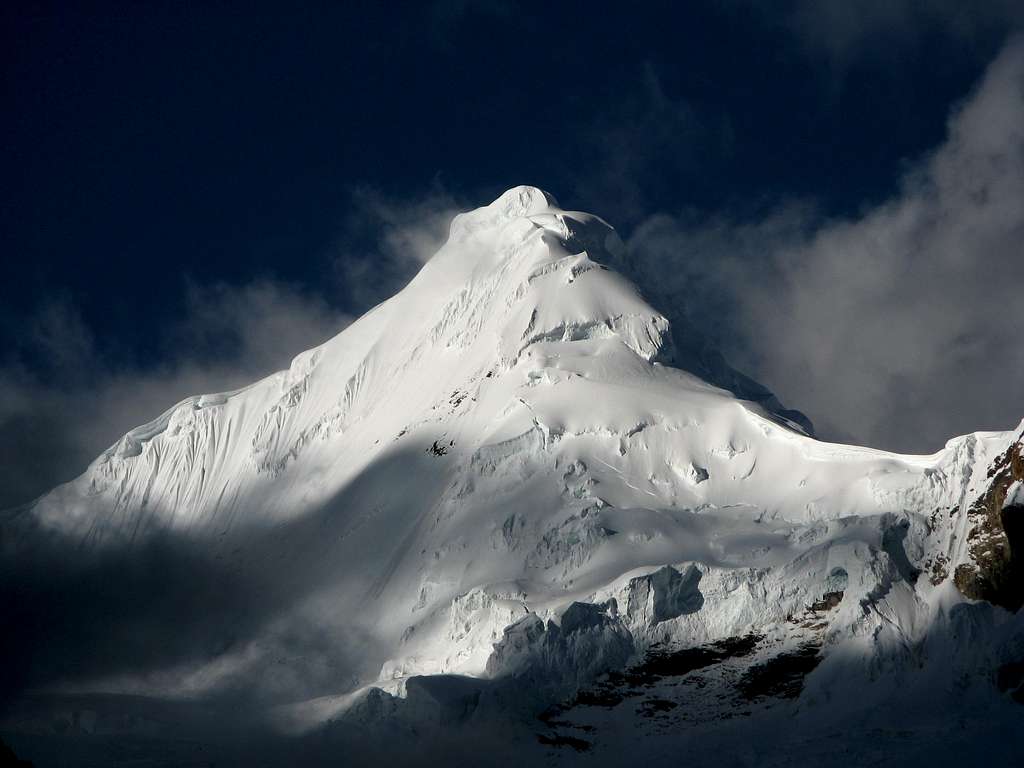
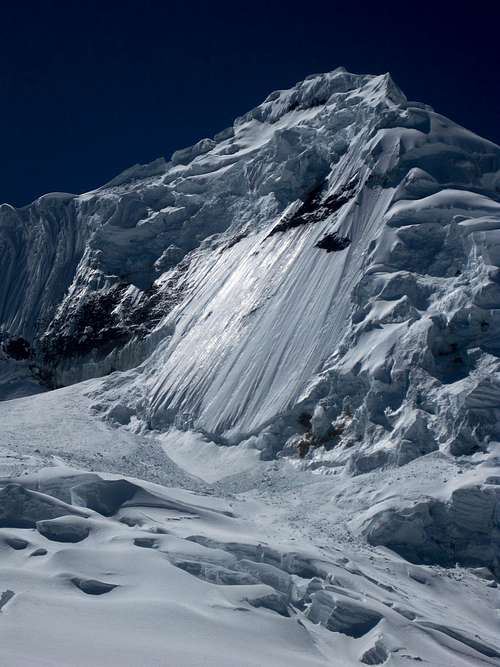
Shaped like a beautiful pyramid, Tocllaraju 6032 m belongs to the mountain massif called Macizo del Chinchey, which is located in the central-southern part of the Cordillera Blanca. The peak is hidden away deep in the mountains. However, because the Cordillera Blanca itself is a relatively small chain, that doesn't mean it's hard to get there.
Toqllaraju is over all a spectacular mountain that majestically reigns over the Ishinca valley. Famous in reason of its beauty, this snowy mountain with attractive slopes and ridges is crowned at its summit by a gigantic ice mushroom. The name Tocllaraju, often also referred to as Toqllaraju, means "trampa-nevado" in Quechua ("trap mountain" in English), meaning probably “snowy mountain that catches", that is it captures and hypnotizes because of its great beauty.
To the Southwest it lies the Quebrada Ishinca ("Quebrada" means "valley"), to the West the Quebrada Akilpo. To the Northwest, North and Northeast the mountain is surrounded by the long Quebrada Honda, with its small side valleys Quebrada Cancahua and Quebrada Pacliash, respectively directly north and northeast of Tocllaraju. From the nearest trailheads, it only takes one day of hiking in any of these valleys to get close. By far the most popular approach is the gentle trail up Quebrada Ishinca. Deep in that valley it lies the Refugio Ishinca, a convenient place to stay.
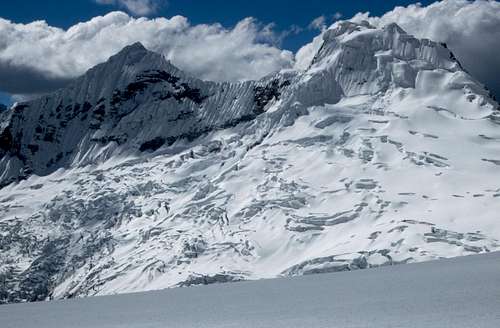
Tocllaraju is surrounded by glaciers and has steep faces and ridges on all sides. Four main ridges shape the mountain. When hiking up Quebrada Ishinca, the first ridge that comes in view is the steep one that starts out to the South, narrowing and turning East after a while, eventually leading to Palcaraju (6274 m). At 5550 m, the saddle between the two gives Tocllaraju a prominence of 484 m. In the opposite direction, another steep ridge stretches North, with a side ridge sprouting off towards the Northeast after a less than a kilometer. A really steep but somewhat less pronounced ridge goes East straight from the summit, and last but not least there is the NW ridge, which actually doesn't quite lead to the summit but joins the North ridge with just 100 (horizontal) meters to go. The relatively wide NW ridge quickly drops to about 5200 m, before narrowing and rising steeply again to the twin summits of Nevado Akilpo (5560m).
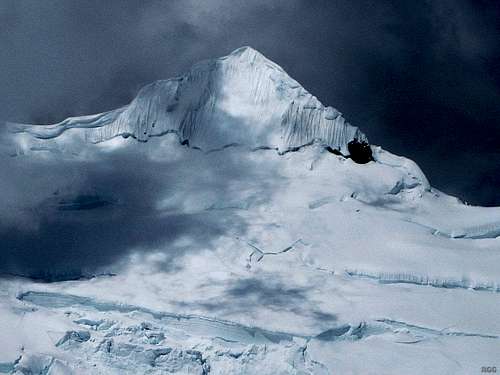
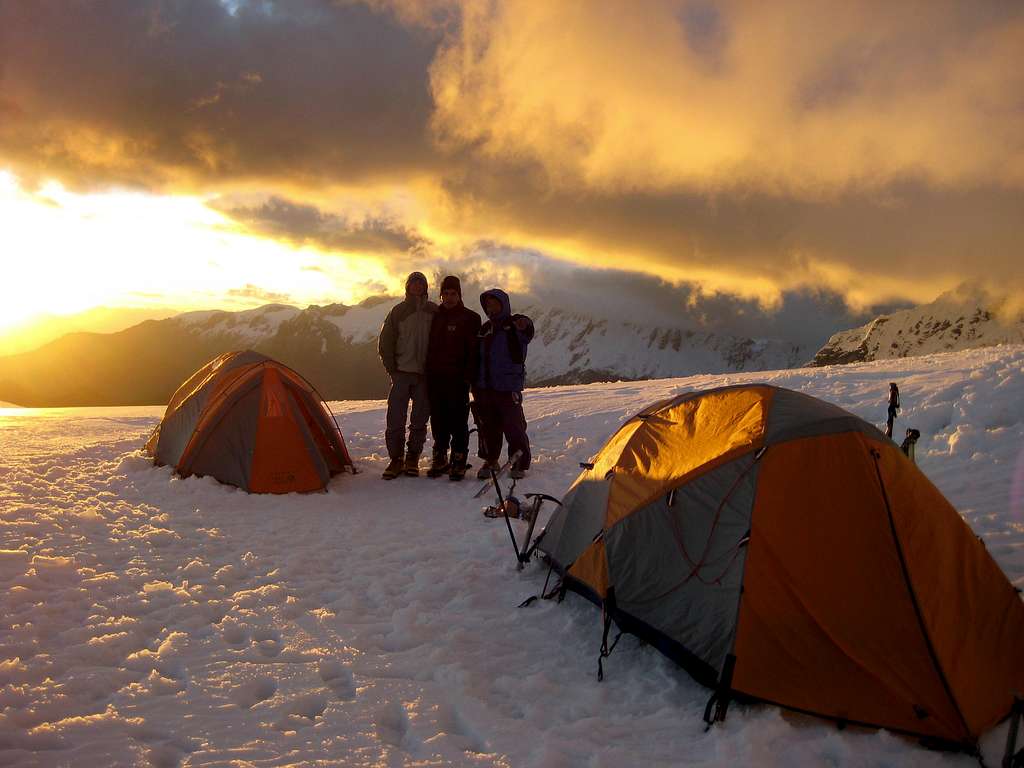
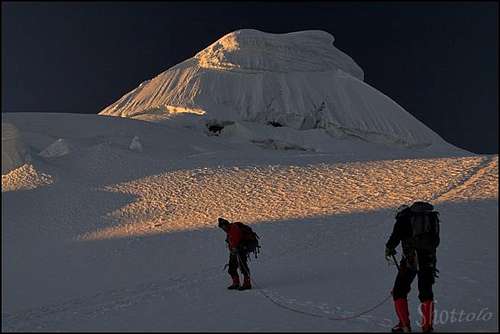
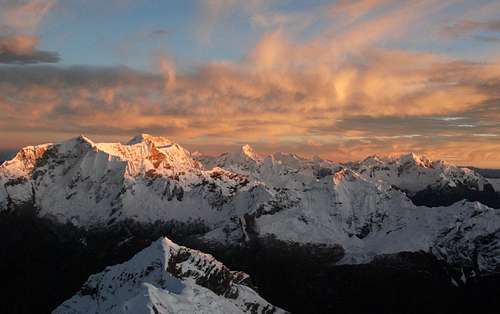
Even if you're not going to climb anything, just only the hike onto the Quebrada Ishinca is worthwhile, as you can enjoy the impressive views of the massive bright and dazzling glaciers tumbling down from the ridge between Tocllaraju and Palcaraju. When you first enter the valley, the glaciers are not visible yet, but as you go deeper, they'll first appear in the distance and then just keep getting bigger and bigger. And if you don't hike back the same day but stick around, eventually the glaciers will no longer be bright and in the few minutes before darkness you may see something like this:
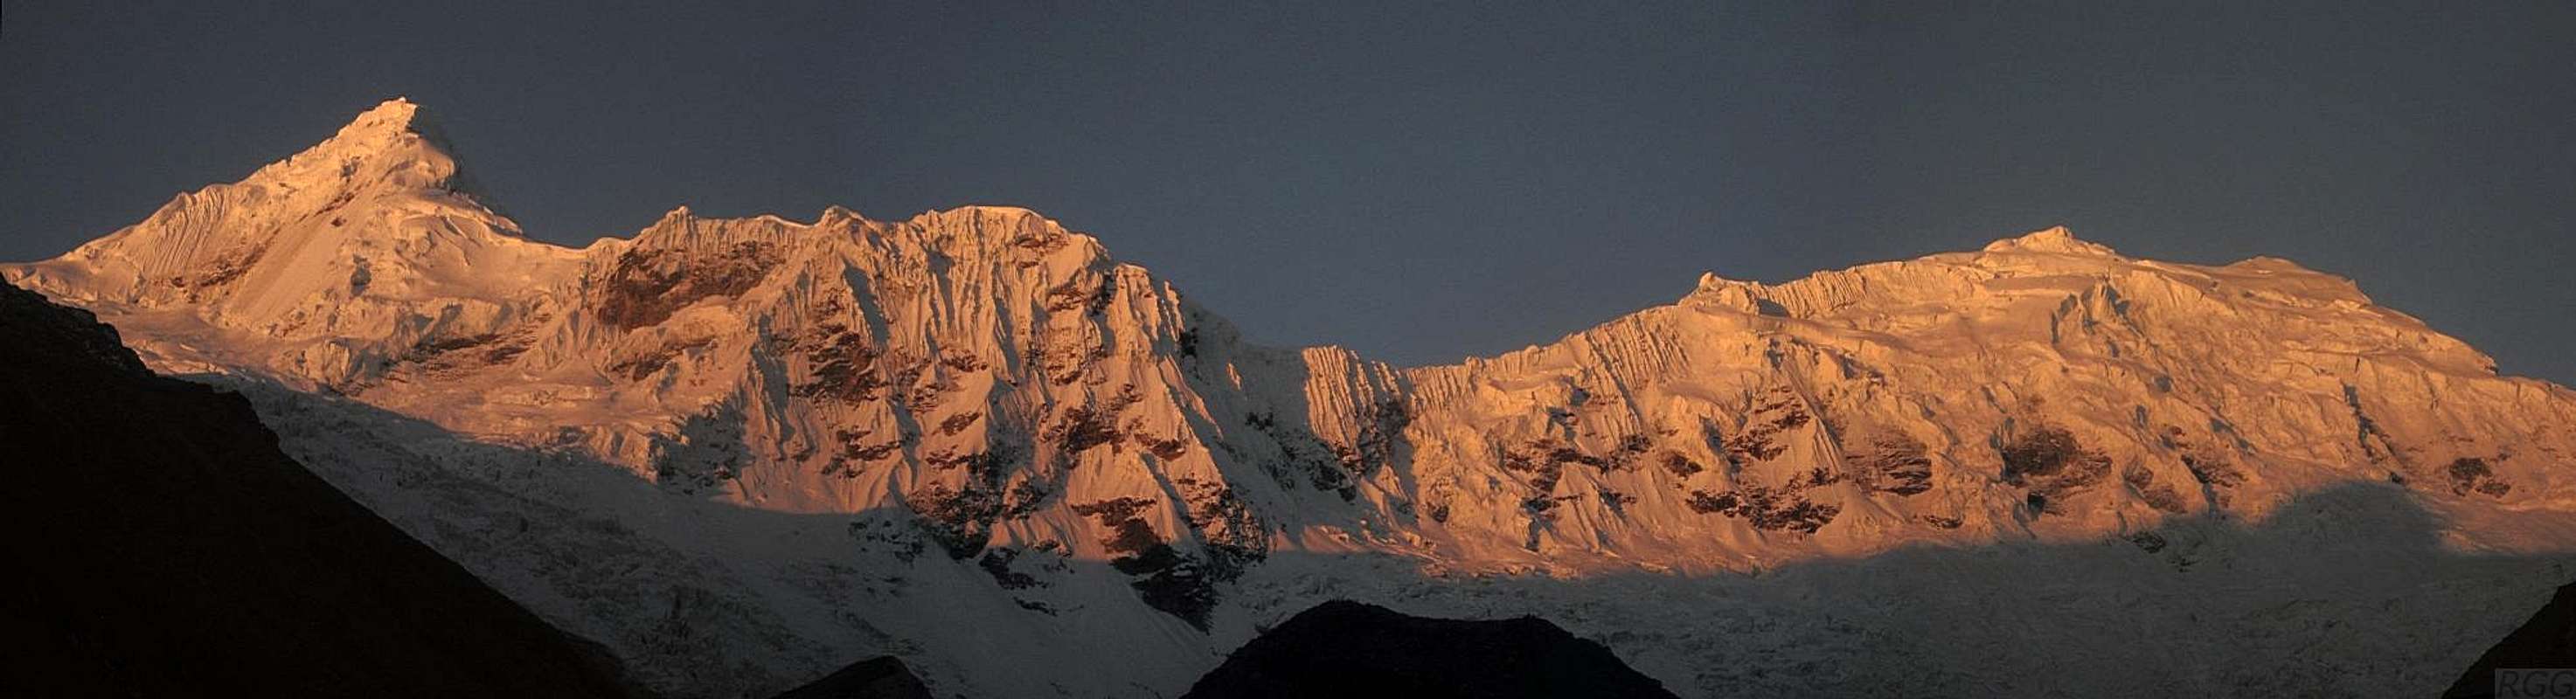 Panorama from base camp, with Tocllaraju on the left and, with the summit far behind, the slopes of Palcaraju on the right.
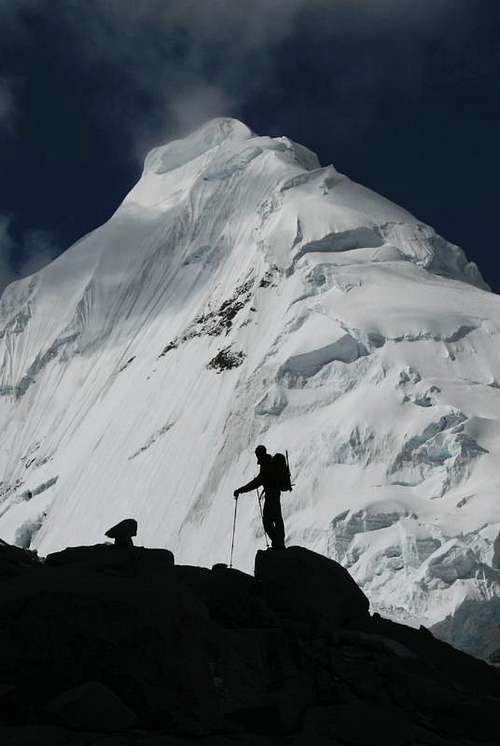
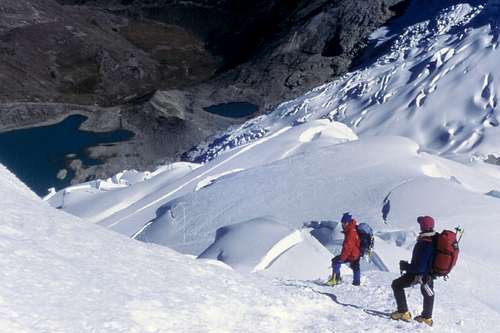
Now, if you want to climb an easy 6000 m peak, the Cordillera Blanca is the wrong place to go. However, it truly is a fantastic playground for mountaineers with a bit of experience and when in good condition Tocllaraju offers one of the least difficult Normal routes to the summit among all the 6000-ers, so it comes as no surprise that it is climbed regularly. It is also one of the lowest 6000-ers, making it very suitable as an acclimatization peak for those dreaming about climbing even higher ones. Make no mistake about it though: one of the least difficult routes still doesn't make it easy. Not at all. The normal route is a climb not to be taken lightly
Addendum: Since the 1930's Tocclaraju was believed to be well over 6000 m, but analysis of modern SRTM data shows that it is probably closer to 5980 m. So, if it's the 6000 m mark that you want to exceed, you better look for another mountain. Personally, I don't climb something because of its elevation, but because I like what I've read about a route, or because I like how a mountain looks. And Tocclaraju still looks as stunning as it looked when I thought it was some 50 meters higher.
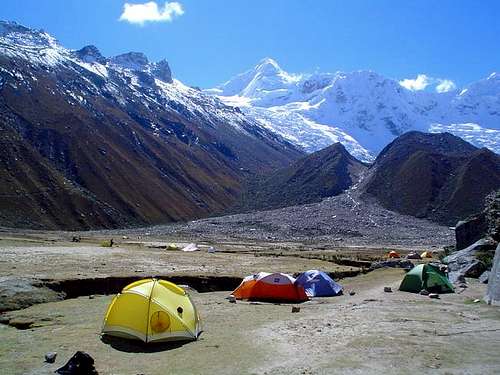
Quebrada Ishinca offers several easy mountains as well. Deep in the valley, at 4350 m, sits Refugio Ishinca, at the edge of a large flat area also known as base camp. Both Urus Este (5420m) and Nevado Ishinca (5530m) are regularly climbed from there and make fine, easy acclimatization peaks. Both take a day to climb, though it must be said that the route to Urus Este is decidedly shorter. For Tocllaraju, Base camp is too low for all but the strongest climbers, and most will need to spend a night camping between 5100 and 5300m before starting the summit attempt.
For the sake of completeness, the same Quebrada Ishinca base camp is also used for climbing Ranrapalca, (6162m) but that's a slightly more difficult mountain. And next to Urus Este there are also the rarely climbed peaks of Urus Central (5495m) and Urus Oeste (5450m).
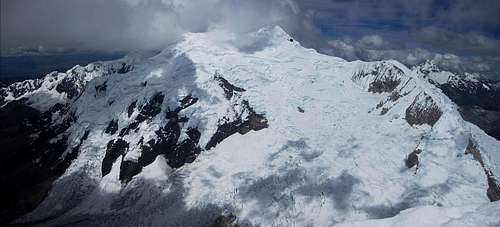
Zooming in on Palcaraju from the top of Tocllaraju
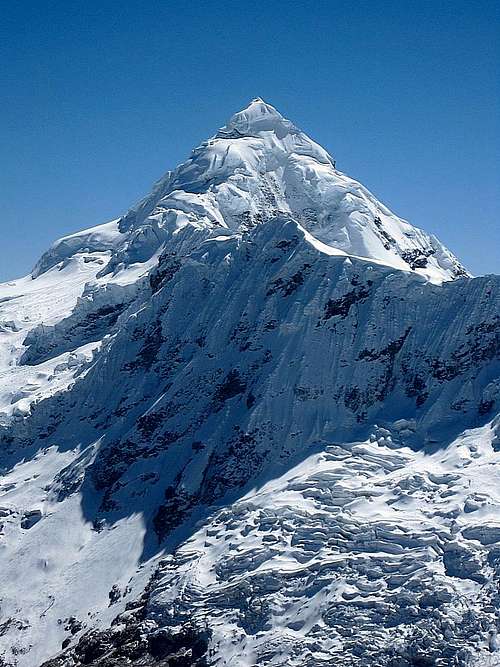
Tocllaraju from the south, from high on Ishinca
Trekking Options
From the trailhead, you can hike to the head of Quebrada Ishinca and back in a long day. Alternatively, you can sleep at the refuge or bring a tent and camp, making it a two day trip.
A popular 3 day "trekking" route in the Cordillera Blanca connects Quebrada Ishinca with Quebrada Cojup further south. To get from one valley to the other, the route crosses a high pass real close to the summit of Nevado Ishinca. Some of the best views of Tocllaraju along this trek can be enjoyed on the trail north of the pass. But there is a reason for the quotes around "trekking": this route involves a glacier crossing. It's neither a very crevassed nor steep one, but it's still a glacier. Nevertheless the agencies in Huaraz offering this route advertise it as a trekking package. Some even include climbing Ishinca, which makes sense since the pass isn't far from the summit anyway.
I've also seen offers of trekking packages connecting Quebrada Akilpo and Quebrada Ishinca. I don't know the route that connects these two valleys, but given the terrain it has to pass somewhere between Urus Este and Tocllaraju, which means it comes pretty close to the latter.
A Few Facts
The Name
The original Quechua name of the mountain is Tuqllarahu, which comes from the words "tuqlla", meaning "trap" or "snare", and "rahu", meaning "snow covered mountain". Sometimes the mountain is called Nevado Tocllaraju instead of simply Tocllaraju. However, since "Nevado" means "snow covered mountain", just like "rahu", that seems superfluous to me. In fact, many climbers simply call it "Toclla".
Elevation
The Peruvian IGN map gives the elevation as 6034 m, the Alpenvereinskarte as 6032 m. However, the latest edition of John Biggar's authorative book on the Andes explains that the elevation is probably somewhere around 5980 m, well below the magical 6000 m mark.
Early Ascents
First ascent: Walter Brecht and Hans Schweizer, 31 July 1939. Approach via Quebradas Honda and Cancahua to the north of the mountain, then across the glacier and finally via the NW ridge to the summit.
Second ascent: Leigh Ortenburger and Kermith Ross, 1959. Approach from the north as in the first ascent, but via the north ridge to the summit.
Current normal route: Daniel Bach, Albert Bezinge, Jean-Jacques Fatton and Carlo Jaquet, 7 August 1963. Approach by Quebrada Ishinca to the SW of the mountain, across the glacier and then up the NW ridge as in the first ascent.
Getting There
There are direct intercontinental flights to Lima, the capital of Peru. From there, the bus to Huaraz, the main logistical center for the Cordillera Blanca, takes about 7 hours.
Getting to Huaraz
Huaraz, the capital of the Ancash region and Cordillera Blanca, is a lively and bustling city located about 3000 meters above sea level, which offers several opportunities for accommodation and food, and also easily the possibility to arrange on-site transportation and trekking for people who haven't previously booked any service. Sometimes there are flights joining Lima and Huaraz, but nor regularly. The best way to reach Huaraz is at moment a 6-8 hours trip by bus or private minibus (if you're travelling with a group or an organized expedition). Currently comfortable coaches provide a good transportation from Lima to Huaraz. There are six different bus companies; the best ones are Cruz del Sur, Movil Tours and Ancash Express.
With the exception of freeze dried food, the local supermarkets and the big central indoor market sell all necessary supplies. Camping gaz is a bit expensive and some of the tourist agencies have a few cartridges for sale. White gas is much cheaper, and much easier to find at several of the hardware stores around the central market.
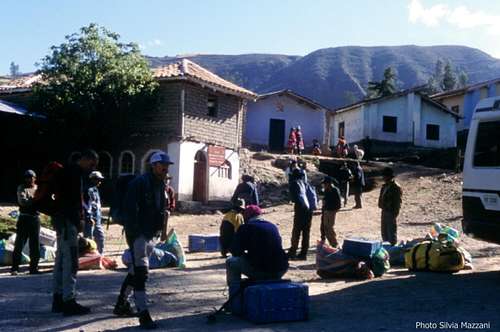
Getting to Collon
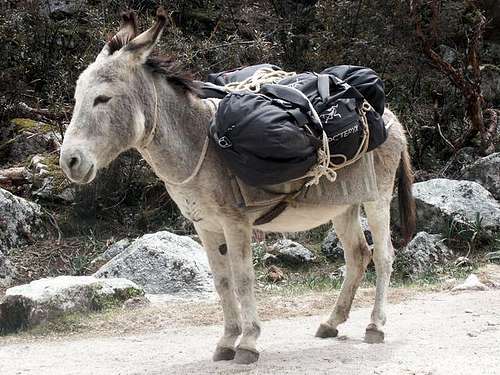
The starting point of the trail to Quebrada Ishinca is situated in Huillac, 2km past the little "pueblo" of Collon, located NE to Huaraz. In Huaraz you can take the bus to the village of Paltay, before Taricá, along the Calleyon de Huaylash main road. From there: find a ride up the dirth road to Collon and Huillac. In Huaraz you can also arrange with a small truck owner to bring you straigth to Collon. This is surely the quickest way and the most convenient option if you share the transport with other passengers. The best choice is to arrange previously for "burros", anyhow if you haven't provide for in Huaraz, in Collon you can hire arrieros (muleteers) with the traditional burros (donkeys) to help you to carry your gear to Quebrada Ishica base camp (3-4 hours from Collon, about 15 km), but make sure to be in Collon early in the morning. To improve your fitness it's as well possible to hike to the BC without burros, but it surely requires an additional effort. From Collon drive about 2 km past the village to the small group of houses in Huillac, where you will find a small PNH (Parque Nacional Huascaran) office. Here you must sign in and can also arrange burros. Another possible trailhead is Pashpa, some 30 min. above Collon, reachable by minibus or by truck. Especially when you return from Ishinca this trail is recommended as it offers great views of Huascaran and the C.B.
The trail up Quebrada Ishinca
The dirty road getting to Huillac continues above and past Huillac, for about one kilometer. The trail to Quebrada Ishinca starts on a bend near the bridge.This attractive path, always heading to the East direction and leaving the stream on the right, is easy to follow. The trail crosses Cordillera Blanca widest forest of "quenuales" trees. Along the way you encounter three spectacular rocky monoliths. After about 4 hours of walking you exit to a vast plain located at the head of Quebrada Ishinca, open towards the glaciers of Tocllaraju 6034 and Palcaraju 6244 m. A deviation to the right, crossing the river on a wooden bridge, leads near some huge granite boulders; here Quebrada Ishinca offers a wide area to put up your Base Camp at about 4400 m.
Routes
NW ridge (Normal route)
Difficulty: D- the final part of the climb, PD+/AD the rest
Altitude gain from the Base Camp: 1682 m
Altitude gain from the High Camp: 932 m
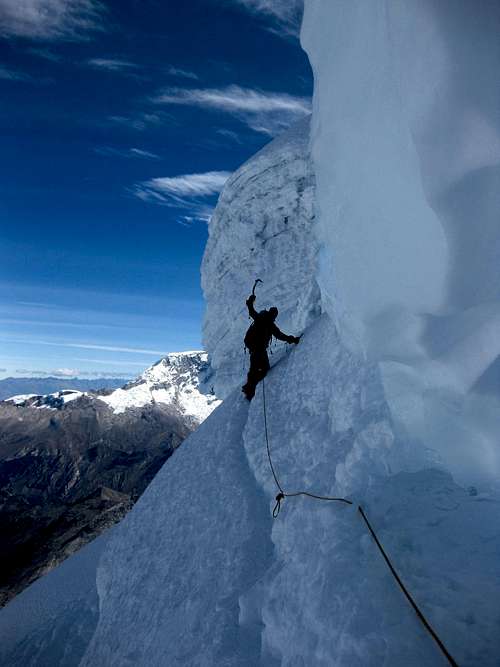
By far the most attended route is the NW ridge. The most technical part of the climb is the overcoming of the bergschrund at the base of the summit mushroom and the slope above it, which can be evaluated from AD to D- depending on the conditions of the same bergschrund (sometimes very difficult to overcome).
To the High Camp
From the refuge or the Base Camp follow the right bank of the quebrada (a large cairn at the entrance of the path) to the moraine broken by the lake. From there, go straight up the slope to the left. Head to the tongue of snow which descends at the foot of a very characteristic pointed peak visible from the base camp. At the end the trail gets lost in the big boulders a bit. Take a foot on the snow and go up to a pass. At the pass, turn right to reach a very well sheltered hollow between the snow and a rocky islet at around 5100 m. (3,30 - 4 hours from the start). To arrange the high camp, the first suitable location is moraine camp at about 5100m, SW of the mountain, right at the edge of the glacier. Sometimes there is a trickle of running water, but I wouldn't count on it if it's cold. Furthermore, moraine camp is not all that big, and since it is a popular route it isn't always real clean. I advise to treat or boil the water before using it.
If you go a bit higher, the glacier levels off at around 5200m. Though not many people camp there, there is lots of flat space, it's clean, and the summit is a little closer. Obviously you'll have to melt snow to get water. If you want to, you can continue a bit further still as there are plenty of suitable spots to camp up until about 5300 m.
Route report
The best place to get onto the NW ridge varies over the years, depending on the conditions. During the climbing season, unless there is fresh snow, there often is a trail. If not, it may take quite a while to find a suitable route in the dark.
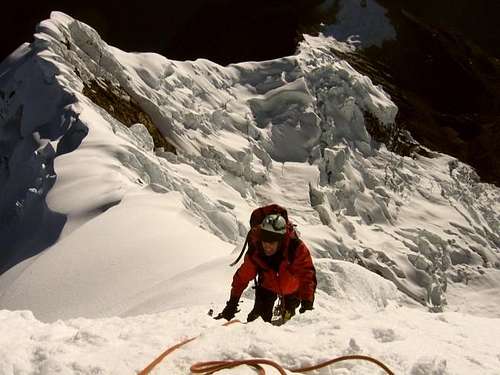
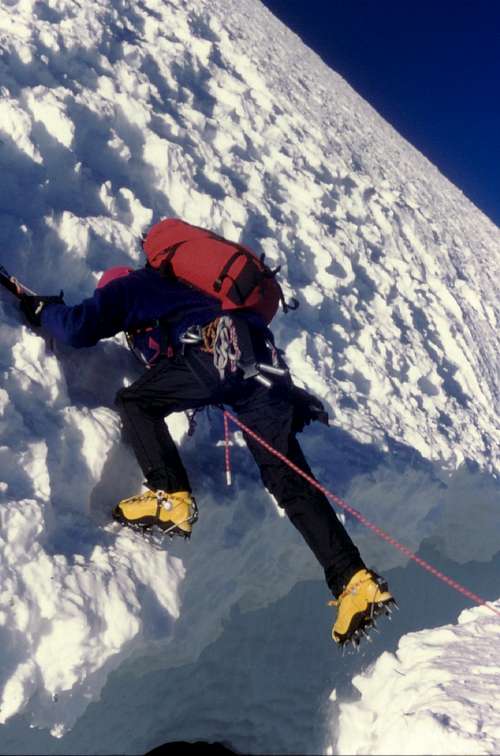
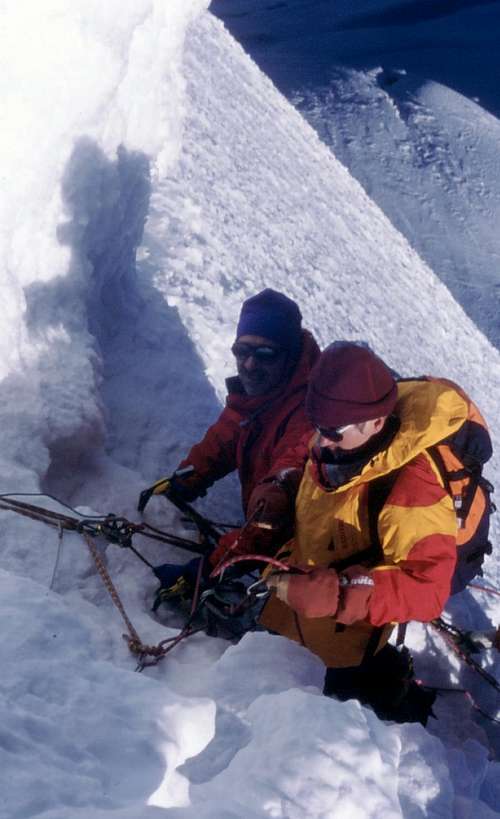
From Camp 1, go up the slopes in the North direction, avoiding the crevasses. The slope is initially slightly inclined, then it straightens (40°) to reach a large crevasse more or less closed depending on the year. After a narrow ice corridor gain a sort of pass in 15 minutes and go up the wide ridge to the right. A new large crevasse gives access to a slightly steeper slope (45°) which leads to the big bergschrund at the the base of the ice wall. 2h15 from the pass to the rimaye. This is the crux of the climb. Sometimes, in particular conditions when the crevasse is very open and the two edges are very far away, it can be difficult to overcome it. After crossing this bergschrund climb the steep slop in 2 lengths (50-55° then 45-50°) to reach the false summit. A small, fairly wide ridge leads to the top. 1 hour from the rimaye to the summit.
Descent: follow the same ascent route. The summit mushroom is abseiled.
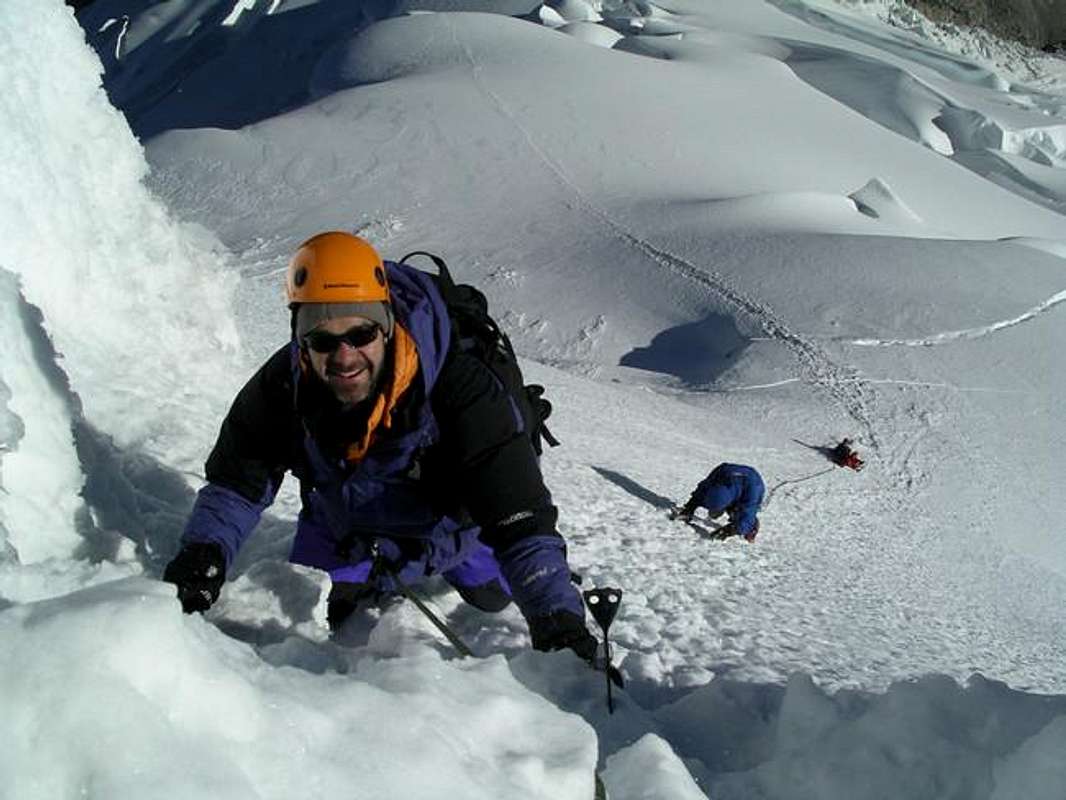
My ascent (july 2002)
Alarm set at three, but but we get up first, woke up by the noises around. Once set foot on the glacier, we follow it for a long time in the direction of the NW edge, reaching the first bergschrund, after which we enter a kind of ice corridor, which appears between the seracs. After a while we reach the steep edge that we climb with a long and interesting climb, until we reach at the first light of dawn the point where it appears the famous "hongo cimero" (summit mushroom). We arrive at the crux bergschrund cutting the summit mushroom at the base, very open. It is more closed at the far right, but in this case it is necessary to make an unpleasant oblique on the very steep ice-wall, so we pass directly the point where it is more open with an athletic step. Above there are two pitch on the ice slope. First length: climb 50 meters of steep ice above the bergschrund and belay in a kind of ice niche. Second length: go up the last stretch of the frozen slope to gain the summit ridge. I follow the summit ridge briefly for about a hundred meters to reach the summit with great joy!
Rgg report (year 2011)
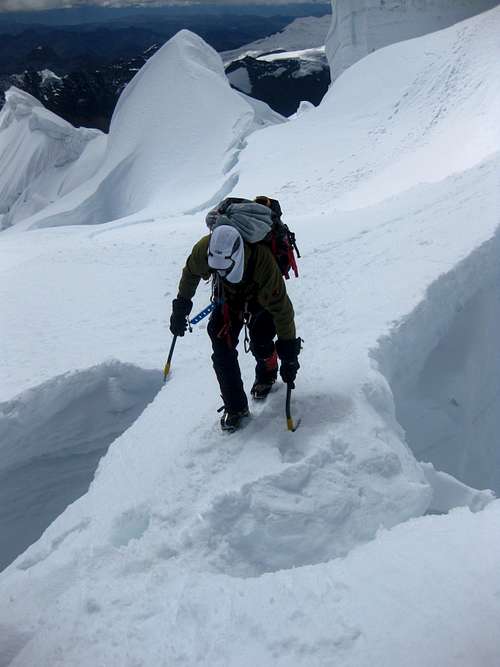
For the most part, the ridge itself is wide. So wide in fact that you can get lost in poor visibility if the trail isn't very clear. We had good visibility, but because the snow was real hard, occasionally the trail was difficult to spot and on the descent we actually had to search a little. Still, I was happy with the conditions, for hard snow is a lot easier to ascend, and the snow bridges over the crevasses are much stronger. There are several big crevasses on the route and if you read various trip reports and route descriptions, the main difficulty of the whole route often is a big bergschrund with less than 100m to go, right at the base of the final steep section, and this is the reason for the D rating. In 2011, we had no such problems with a schrund at all, which, judging by both older and newer reports, was unusual. To save time we decided not to protect it, so we unroped and both soloed up.
In 2011 the crux was the steep section right before gaining access to the ridge. It was 70º right at the bottom, above a small bergschrund, but quickly easing to about 60º and easing still a bit more higher up. In less than two rope lengths we were on the ridge, where we could simply walk. Higher up there were a few more steep sections, but never more than 55-60º, and mostly we could just walk up.
With the route being in great shape, we took 6 hours from our camp at 5200 m to the summit, matching what the guidebooks say. Descending went much faster. Occasionally rappelling but mostly walking and climbing down, we were back at our tent in less than 2.5 hours, and after a break and packing up we got down to Refugio Ishinca in another 2 hours.
Judging by the Climber's Log entries, the difficulties in 2013 were comparable - except that the snow wasn't nicely packed and hard, but sugary. Well into the season it should have been consolidated. That it wasn't illustrates how conditions in the mountain can be quite different over the years.
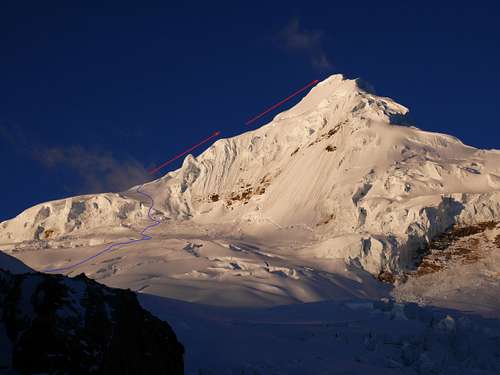
The west face reflecting the sun, 2011
West Face
A distant second in popularity, the steep West face is climbed occasionally. It looked dangerous in 2011, with lots of debris below the face and massive seracs hanging above it; and part of the route was bare rock. I seriously wondered if it would get in shape again in the years to come.
North Ridge
This was the route of the second ascent. How often it's climbed since, I don't know. For what it's worth, the Second Ascent report doesn't state how difficult it was back then, but the glacier has probably changed a lot over the years anyway. The map contours show that it is much steeper than the NW ridge, suggesting that it's harder.
 Summit view to the northern Cordillera Blanca. You have to start real early for this sunrise!
Red Tape
The whole of the Cordillera Blanca lies in the Parque Nacional Huascarán, one of most spectacular high mountain area in Perù, established in 1975 and acknowledged as an Unesco World Natural Heritage in 1985. Unesco Link here: Unesco infoThe Huascaràn National Park is administered by the Instituto Nacional de Recursos Naturales (INRENA). An entrance fee is due. In 2011, the fee for the Huascaran National Park was 65 Soles for 21 days. Since 2011, officially nobody is allowed to climb without a Mountain Guide, except for the persons who are members of a Mountaineering Association. In this case, the permit can be obtained at the National Park Office in Huaraz, showing the Alpine Club card.
.
Always be respectful of this fragile landscape. Carry-out everything you bring in and any litter that you carry-in or that you find on the routes and help to conserve the beautiful landscape! Take care of nature as usual in the natural sites and particularly within the boundaries of all the natural parks.
When to Climb
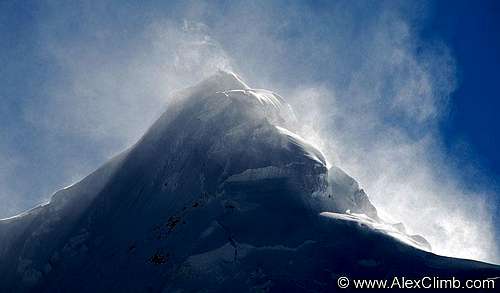
Windy conditions
The best months are July and August, and June isn't too bad either. Earlier in the year the snow may still be unsettled and avalanche risk can be higher, though avalanches may occur all year round. Sadly, in July 2013 two Argentinian climbers died in an avalanche on the mountain.
By the end of the climbing season the weather can be a bit less stable and strong winds sometimes become a problem. But after a period with little or no fresh snow and with a favorable weather window, a late season attempt is still viable.
In the picture below you can see a wide panorama from moraine camp, spanning almost 270º. On the left there are Tocllaraju, Palcaraju and Pucaranra, on the right Ranrapalca and Ochshapalca, with Quebrada Ishinca below. Just right of center and left of Ranrapalca, hiding in the shade and barely visible, it lies the small Nevado Ishinca. It looks rather insignificant, but it's still 5530 m high and one of the most frequently climbed mountains in the Cordillera Blanca. The main reason for that is that it's one of the easiest ones, but the climb is fine and the magnificent summit views don't hurt at all either. No surprise, really, if you think about it, with all these wildly glaciated 6000-ers towering above and around it. For just one example, scroll up this page and you'll see a photo of Tocllaraju from Ishinca.

Accommodation
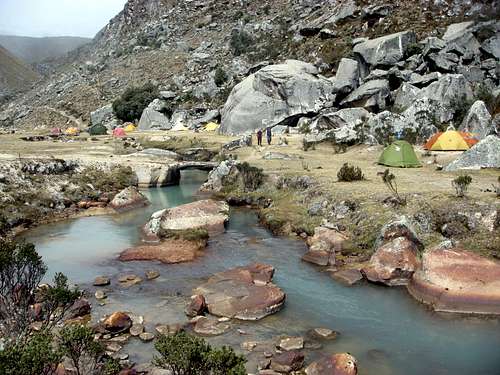
Just a small part of Ischinca base camp
In Huaraz there are many hostels to chose from, as well as some more expensive options.
Refugio Ishinca, located at base camp, has bunk style accommodation and serves meals. Alternatively, you can put up your tent (for free), or camp but still order a meal in the refuge, or even sleep inside but prepare your own food. Depending on your plans, you may need to bring a tent and a stove. Always bring a sleeping bag.
To climb Tocllaraju, unless you're very fast, you'll need camping gear for high camp anyway, so using the refuge doesn't save all that much weight, except a bit on food.
Guidebooks and maps
Guidebooks


- "Classic climbs of the Cordillera Blanca – Perù" by Brad Johnson, 2009 revisited edition - ISBN 978-9975860618 in English
- "The Andes - A guide for climbers" by John Biggar, 3rd edition, 2005 - in English
- "Escaladas en los Andes" by Juanjo Tomé Ed. Desnivel, 1999 - in Spanish
- "Climbs of the Cordillera Blanca of Perù" by David Sharman, 1995 - in English
- "The Andes - A guide for climbers" by John Biggar - 4rd edition, 2015. ISBN 978-0953608744.
Maps
Alpenvereinskarte 0/3a Cordillera Blanca Süd (Perú) 1:100000

ClimberMan420 - Jun 14, 2007 9:10 am - Hasn't voted
West Face June 8th 2007Gain face at highest part(left) of the bergshrund. The bergrshrund was wel open but on teh right side of the highest part it was crossable and here the cliff on the other sside is smallest. May have to hack a notch in it if its to snowy to climb. Climb face directly slowly travrsing to the right past the exposed rocks. Pass the seracs and ice cliffs to the right for the easiest and most direct access to the South west ridge6-8 pitches. Follow the mellow ridge to the summit. The ridge is easy but has some interesting features of ice cliffs and crevasses to negotiate. It should stay in good shape most of the season. The most likely problem will be the bergshrund at the bottom of the face to access the climb. I suggest an acclimatization day to hike up to the face breaking trail and find access. We used almost exclusively snow stakes and a few ice screw near the top. Climbing 2 ropes and three people we were about 9 hours on the face and then 1 1/2 more on teh ridge pitching up it although a running belay or even solo free climbing could do. Descend the North ridge hopefully on an already established boot pack as the north ridge is a cvery popular climb. A 50m rappel is a convenient way to descend from teh summit shoulder on teh north ridge. Brad Johson rates teh face a D+ and the north ridge a D but the ridge as of June 07 was a walk down most of it.
Matt Lemke - May 3, 2017 10:08 pm - Hasn't voted
Park pass good for 21 daysThis must be a recent thing, since most of the SP pages for the C.B. say the 65 Sol park pass is good for a week, when in reality it's good for 3 weeks.